- /
- /
- /
Updating Images in UX Builder on WordPress
Updating images on a WordPress website is easy. In this article, we’ll show you how to do it on a specific page using UX Builder.
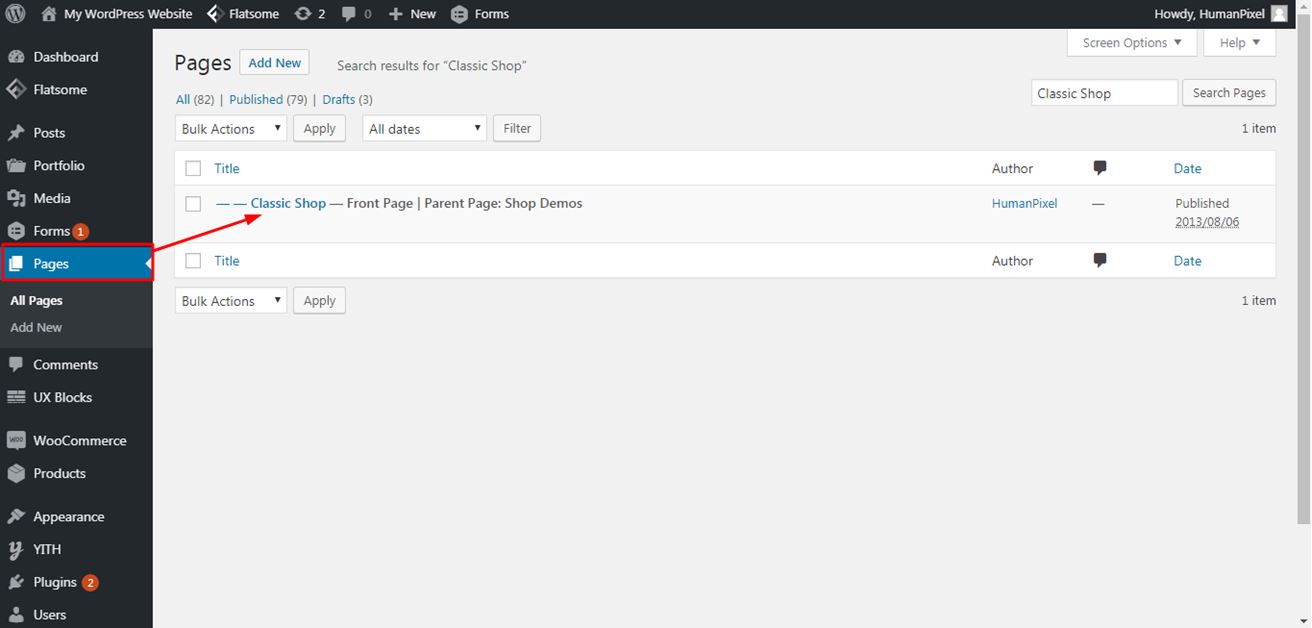
- In the Admin Panel, go to Pages. Choose the page wherein you would like to change an image.
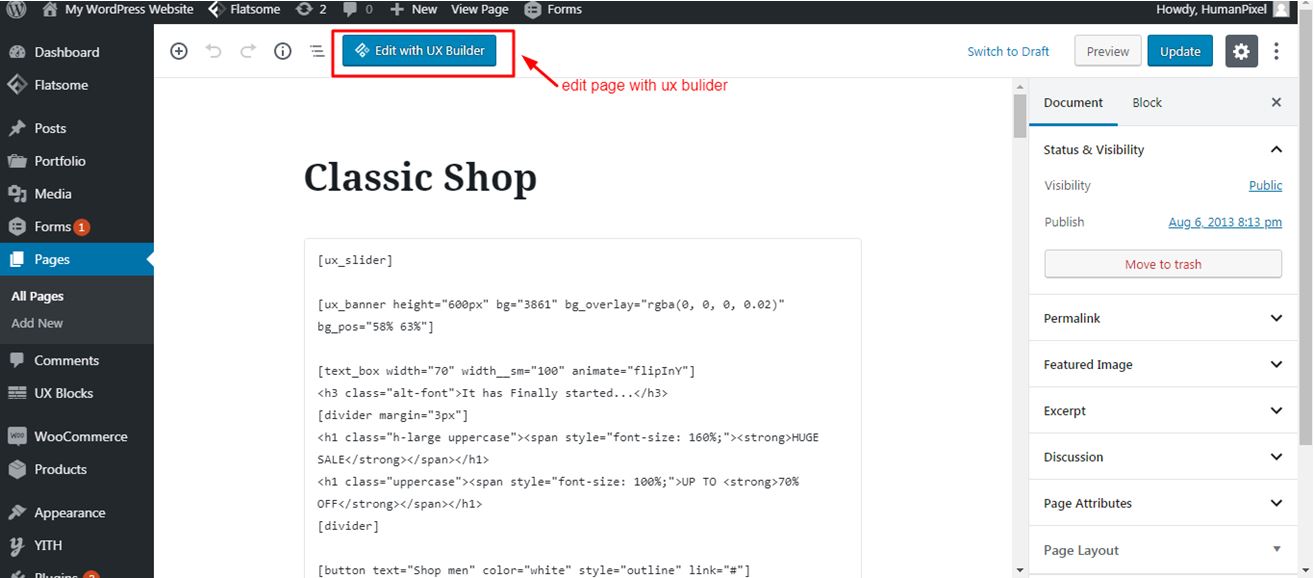
2. Click on Edit with UX Builder.
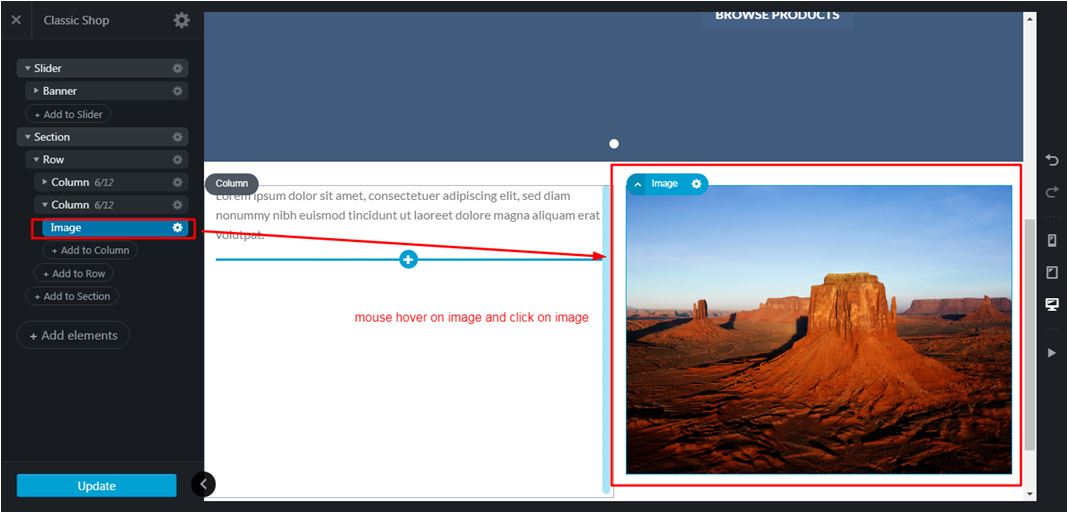
3. Click the image you want to update on the page.
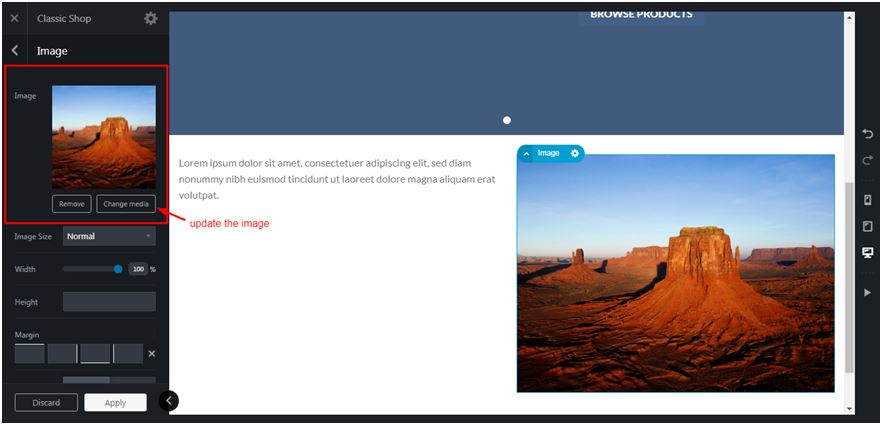
4. You will then see the option to Remove and Change Media on the left side pane. Choose Change Media.
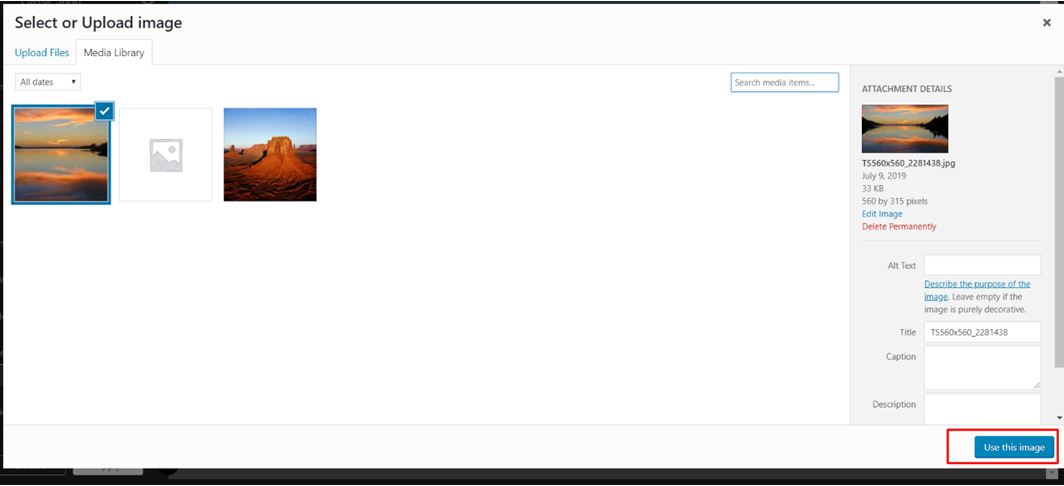
5. The Select or Upload Image window will appear. Choose the new image from the Media Library and click on Use This Image.
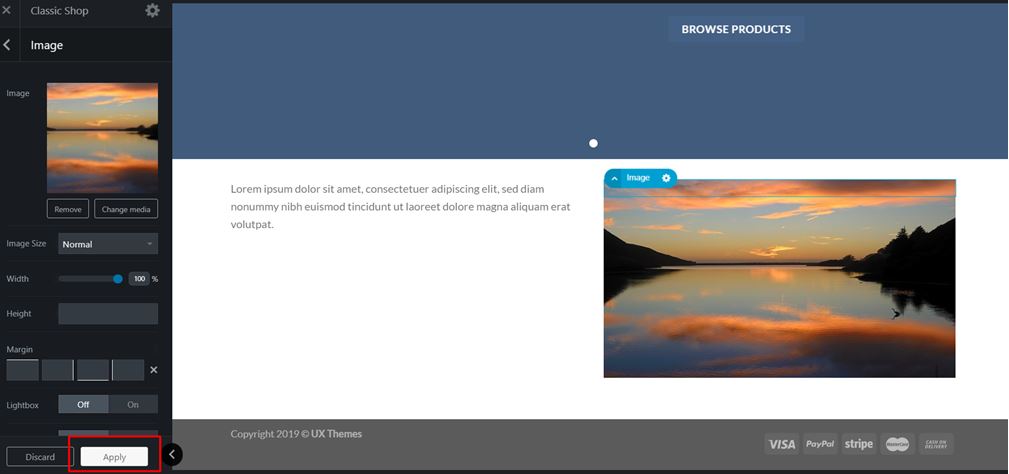
6. You will now see the new image in place. Click Apply.
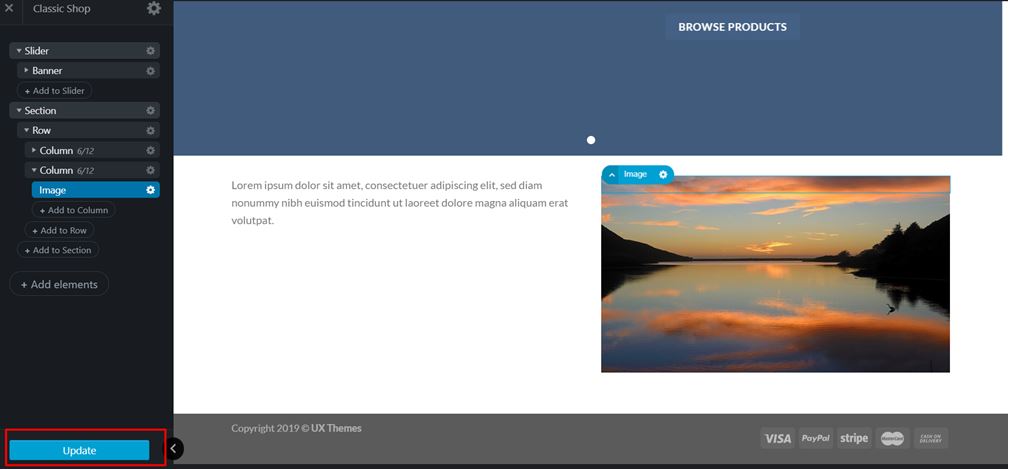
7. Lastly, hit the Update button to save your changes.
Got some questions about WordPress or interested in updating your website? We’re here for you. Just click the button below to talk to one of our WordPress specialists today.